XenoGC Install
About the xenoGC
The XenoGC Install is a lot easier than it first seems, though it does require a fair bit of soldering knowledge.
First, check out the disassembly guide before continuing! You need to have the RF Shield removed from the drive(looking at the PCB of the drive).
There are two types of installs, wired and wire-free. Since the xenoGC is an open-source modchip(meaning anyone can make it), it’s been cloned countless times, and the specifications of the pcb might be off. For this reason we personally recommend a wired install.
If you need a video in order to understand, this one by rockergaming covers the entire install and even disassembly(though through timelapse)
Installing
Wire-free install
Make sure you cover up the unused pads to avoid bridging.

Wired install
Referencing the image below, use some small wire like 30 or 32awg magnet wire for the data wires and 22awg for power and ground(power is pad 10 and ground is pad 1 in the image below)

Testing / Troubleshooting
When you power on the cube you should see a red LED light up and then turn green(or turn orange depending on the version). this indicates the drive has been patched and should read burned / out of region discs. If you aren’t using out of region(but official) discs but instead burned media, proceed to the next step
Laser adjustment
Typically this step is required, you want to turn the potentiometer on the cube to lower the resistance, we recommend going about 10ohm at a time. use a multimeter to verify the correct resistance.
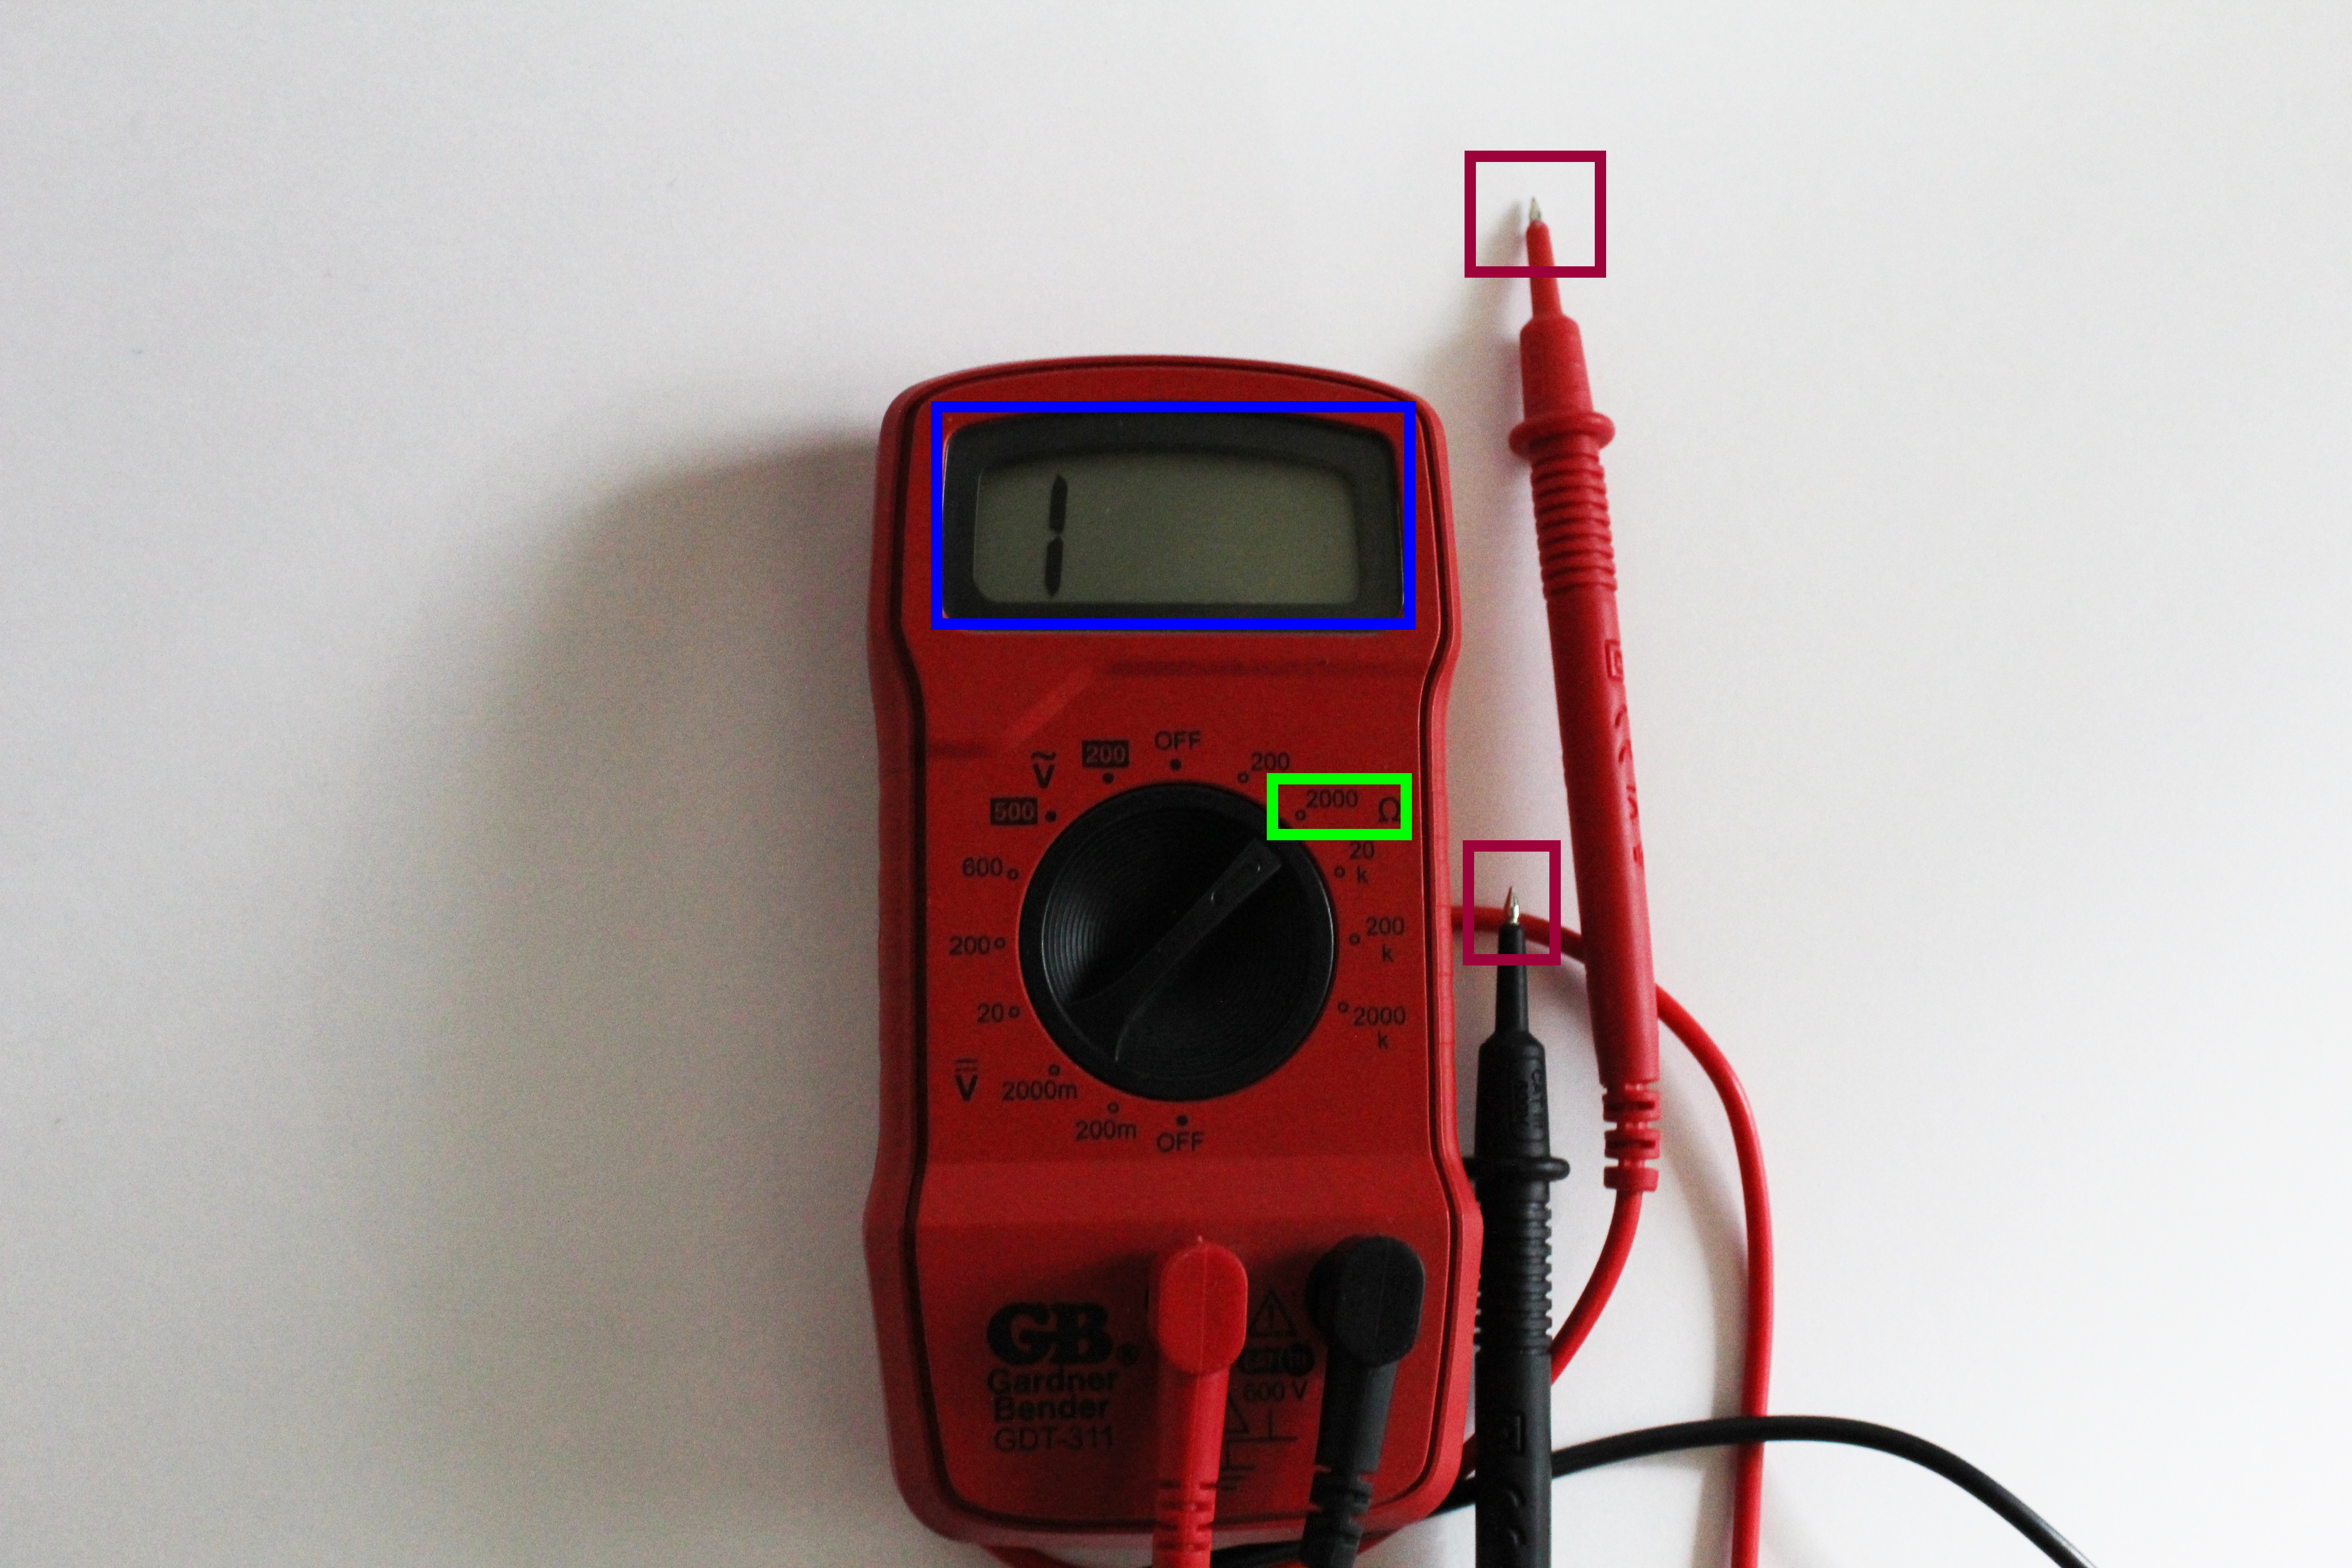
Make sure your multimeter is on Resistence mode, set above 200ohm(highlighted in green)
The blue highlighted section is your reading, this tells you the resistence.
The Red highlighted section are your multimeter leads, you will use thse on the potentiometer to find the resistence.
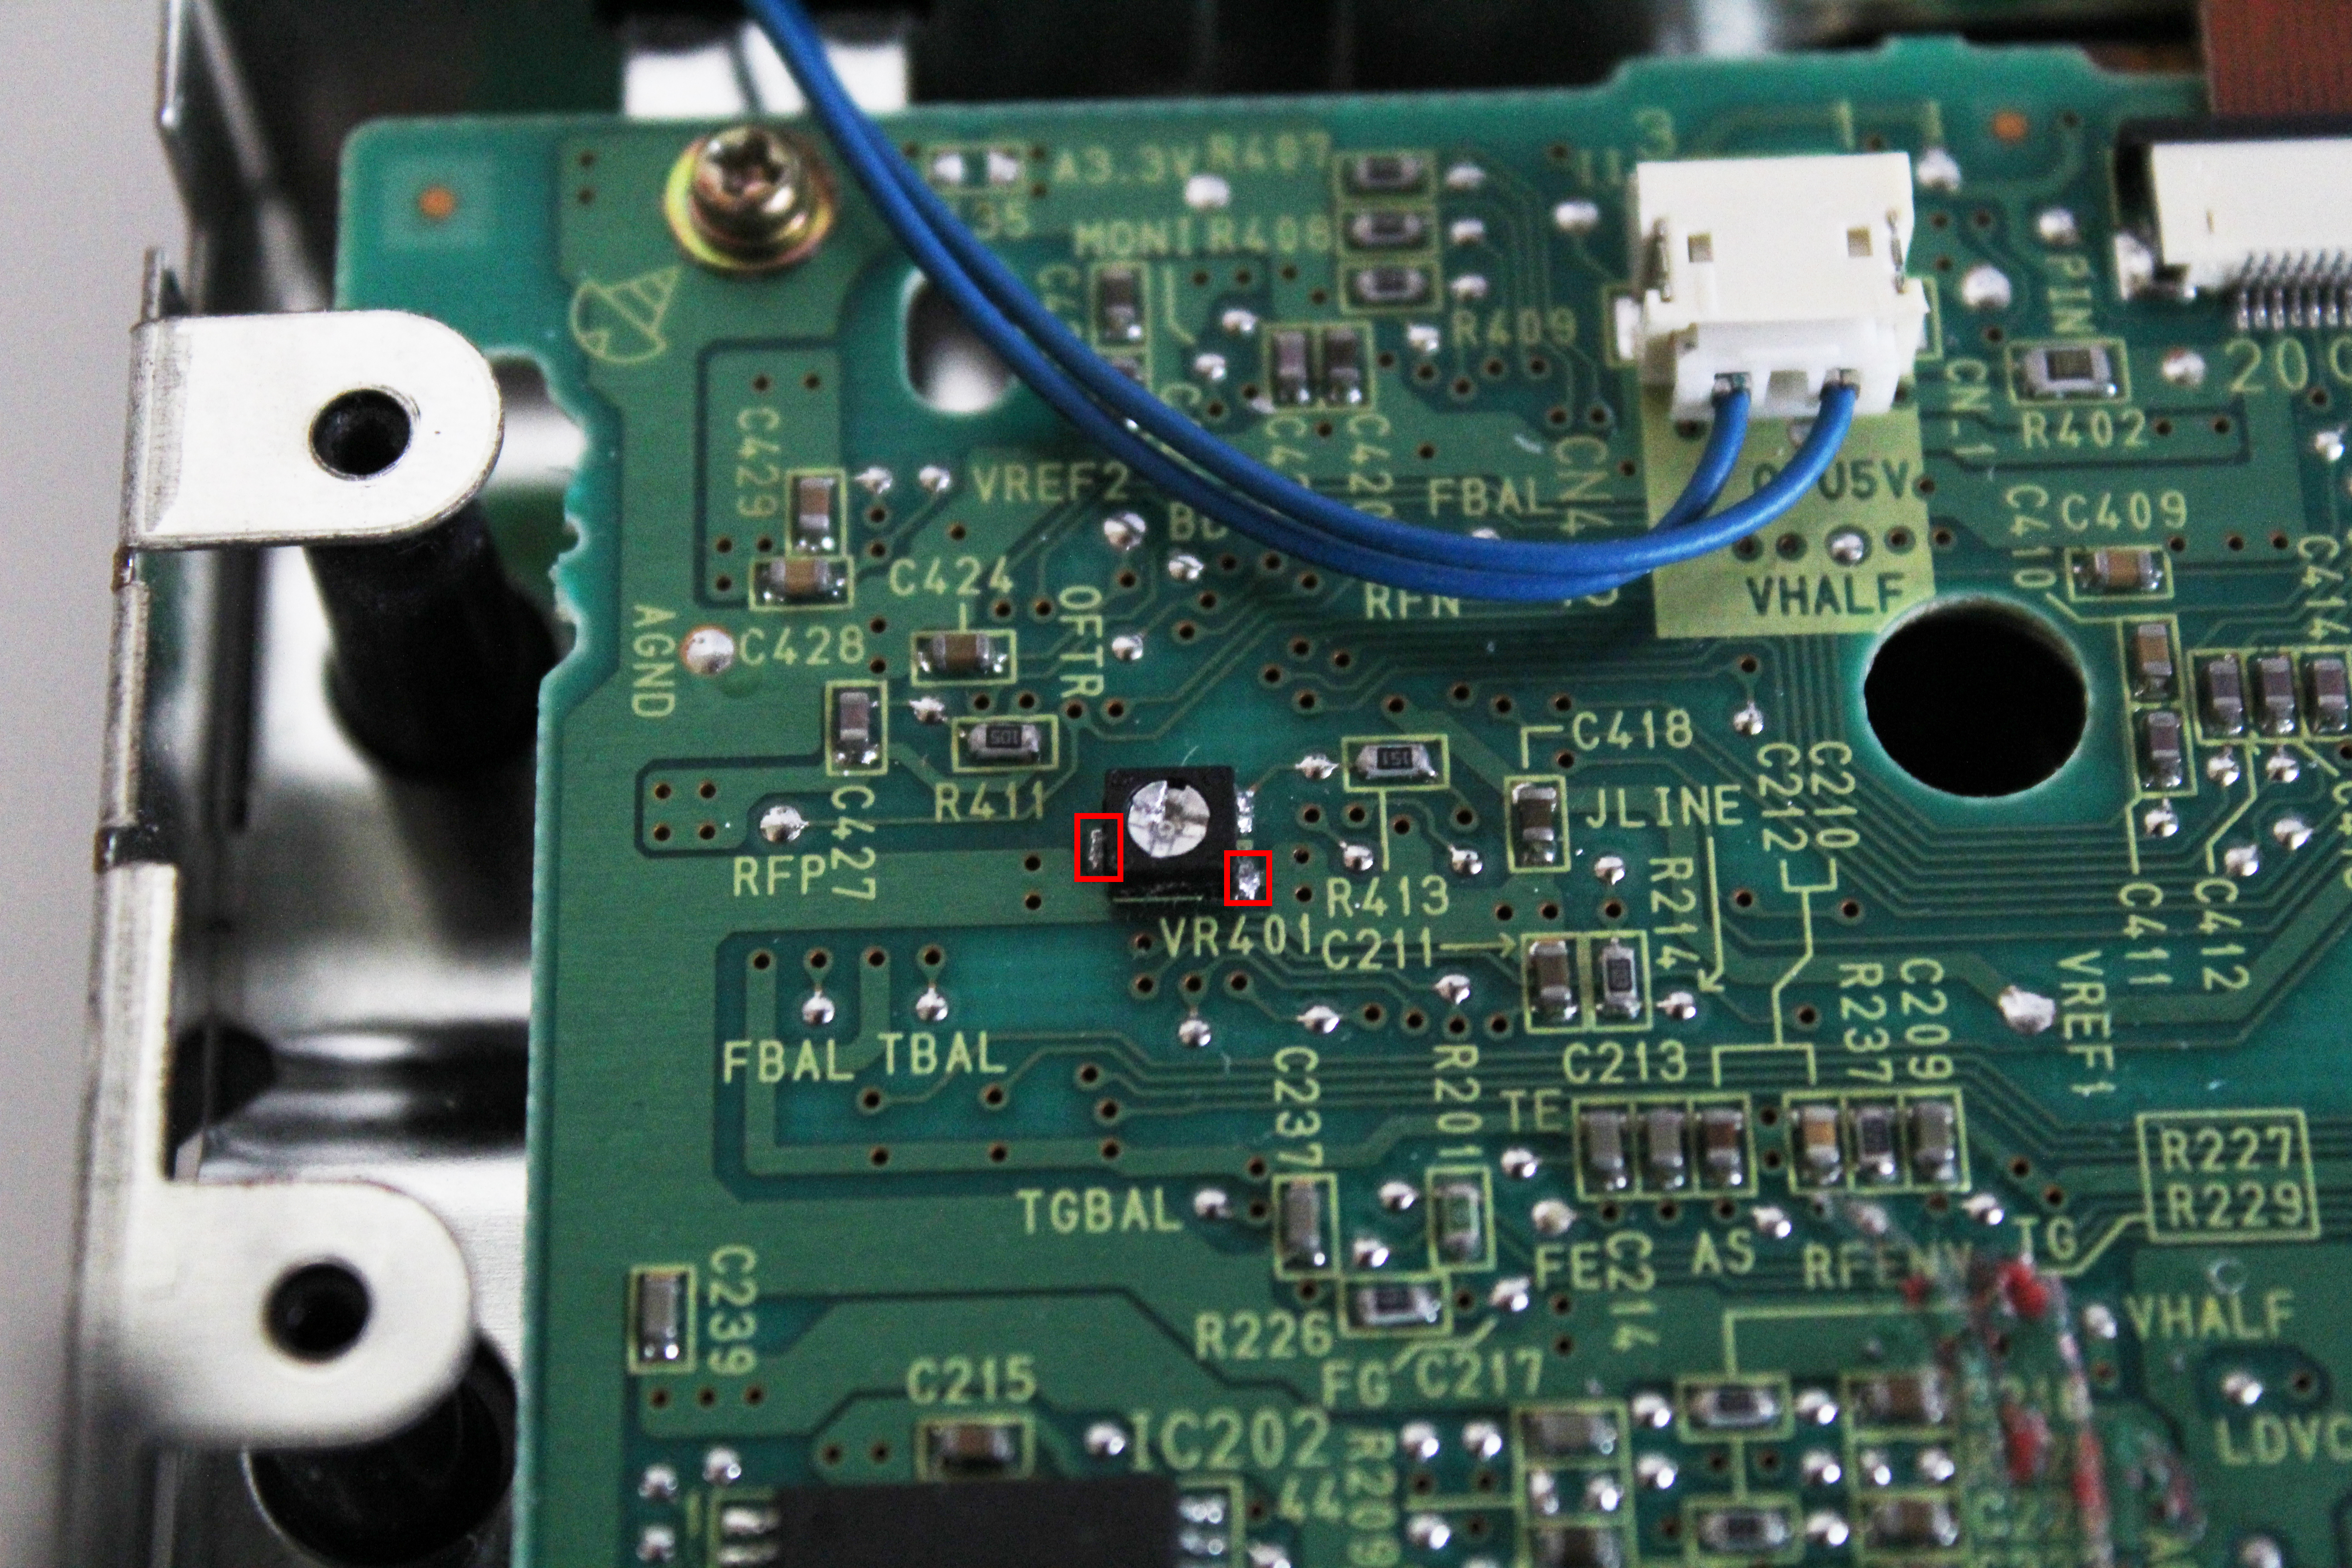
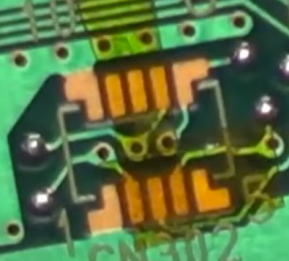
Above is the drive potentiometer, touch the two leads of your multimeter to either point(the color does not matter.) and check the reading. for DOL-001 units(the drive assembly, not the cube itself) this should be between 450 and 600 ohms, make sure to lower it when testing media. for DOL-101 units this can be more around 150-250. Again, lower if if you can read retail discs but not burned ones.